Good window film is only half of a great install. The other half is having the right tools within arm's reach before you peel the first liner. Most DIY problems, like trapped dust, ragged edges and bubbles that won't go away, come from working with the wrong tool or from stopping mid-install to hunt for one.

Use this checklist to gather everything before you start. It follows the order you'll actually use each tool, from mixing your slip solution to the final squeegee pass.
Quick checklist
- Spray bottle (one for slip solution, a second is handy)
- Baby shampoo, for mixing slip solution
- Scrub pad and a razor scraper, for cleaning the glass
- Lint-free microfiber towel
- Tape measure and a film marker
- Main squeegee
- Hard card squeegee, for edges and corners
- Snap-blade knife with fresh blades
1. Spray bottle
You'll spray the glass, the adhesive side of the film and the outside of the film, so a comfortable trigger matters. A basic Mazi Trigger Sprayer on a 32 oz bottle works well for a few windows. If you're doing a whole room or large panes, a pump sprayer like the Polyspray 2 saves your hand and keeps the glass evenly wet.
Tip: Keep a second bottle with plain water nearby for rinsing your tools and hands.
2. Slip solution
Slip solution lets you slide the film into position before it bonds. You don't need anything special: fill your spray bottle with 16 oz (475 mL) of water and add 6 to 10 drops of baby shampoo, then shake gently.
Avoid: ammonia-based cleaners, Windex® and degreasing dish soaps. They can interfere with the adhesive.

3. Glass prep: scrub pad and razor scraper
Every speck left on the glass ends up trapped under the film, so cleaning is the step that matters most. Spray the window, work it over with a white scrub pad (or The Scrubber for larger glass), then go over the surface with a razor scraper such as the 3" Triumph Scraper to lift paint specks, stickers and stuck-on grime. Don't forget the gaskets and the edges of the frame, where dust hides.
Tip: Hold the scraper flat to the glass and keep the surface wet while you scrape.
4. Microfiber towel
A lint-free towel finishes the cleaning step and wipes down the frame so debris doesn't drip back onto the glass. Paper towels leave fibers behind, so use a Dr. Solar microfiber towel instead. You'll also wrap it around your hard card for the final pass (step 8).
5. Tape measure and film marker
Measure the width and height of the glass and cut your film about 1 inch (25 mm) larger on every side. A film marker lets you mark your cut lines on the liner side without guessing.
6. Main squeegee
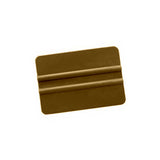
This is the tool that does most of the work. After the film is in place, it pushes the slip solution and air out from under the film. A firm, smooth-edged squeegee like the 4" 3M Gold Squeegee is a good all-around choice for flat home windows. Start with a "T" stroke across the top and down the center, then work from the center out to the edges.
Tip: Lightly spray the outside of the film before squeegeeing so the blade glides instead of dragging.

7. Hard card squeegee
Hard cards are thin and stiff, which makes them ideal for edges, corners and tight spots near the frame. They're also the straight edge you'll trim against. A white hard card or gold hard card is inexpensive, so keep a couple on hand.
8. Snap-blade knife and fresh blades
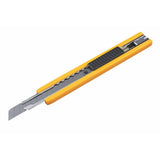
A sharp blade is the difference between a clean edge and a ragged one. A snap-blade knife like the Olfa A-1 lets you break off the dull tip and expose a fresh edge in seconds. Stock up on refills such as Olfa AB-10S stainless steel snap blades and use a fresh blade for every window.
To trim, hold your hard card against the edge of the glass and run the blade along it, then remove the excess film. For the final pass, wrap the hard card in your microfiber towel and push any remaining water toward the gaskets.

Nice-to-have extras
- A second microfiber towel, so one stays dry.
- Tape, to help separate the liner from the film at a corner.
- A blade disposal case like the Olfa DC4, so used snap-off tips don't end up loose in the trash.
Installing on a car instead?
Car windows are curved and the gaskets are tighter, so auto tinting usually calls for a few extra squeegees and more patience. Read our DIY window tint guide before you start, or skip the cutting entirely with a precut tint kit.
Ready to install?
Once your tools are together, follow our step-by-step home window film installation guide. You can find everything on this list in our installation tools collection, and if you still need film, start with HeatCore Clear for heat and UV control without a dark look.